Introduction
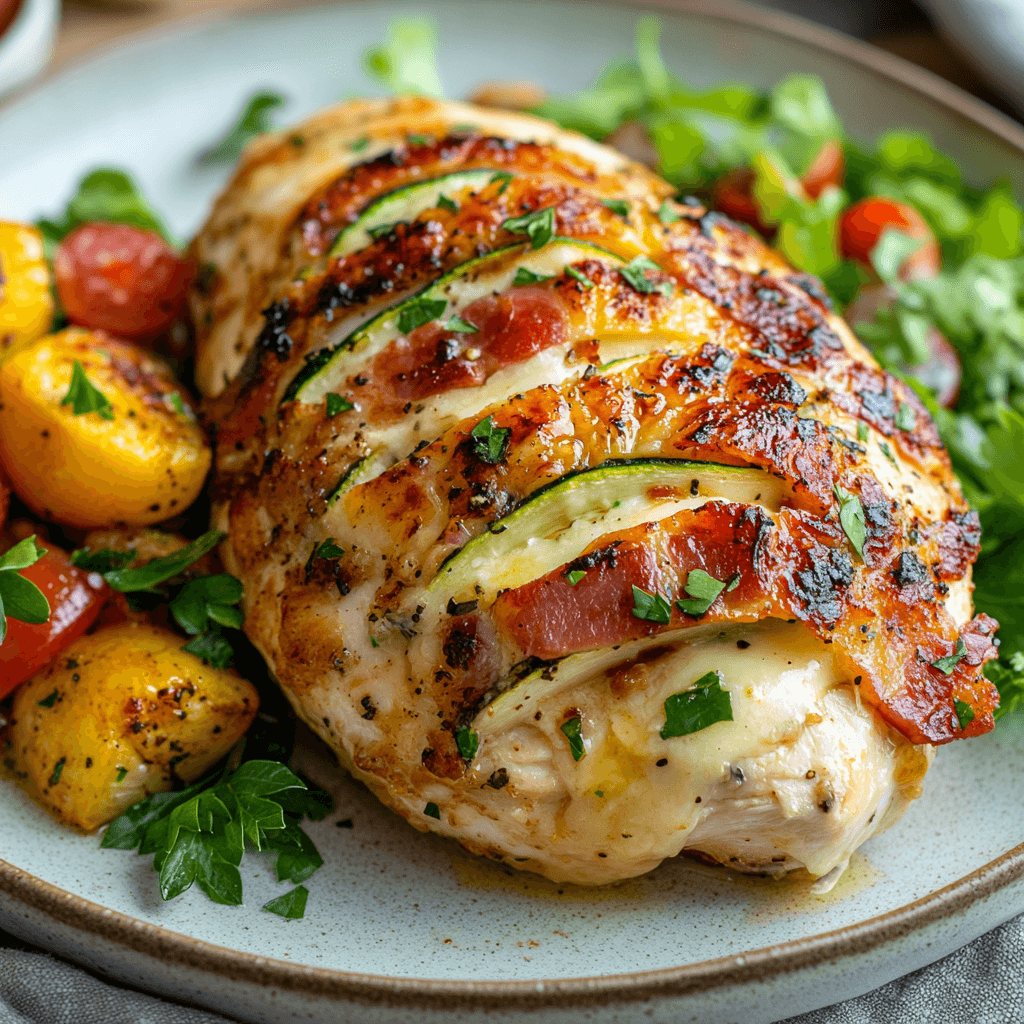
Hasselback Chicken is a flavorful, visually appealing, and easy-to-make dish that fits perfectly into a busy lifestyle. Inspired by the Hasselback potato technique, this recipe involves thinly slicing chicken breasts without cutting through, allowing for a variety of fillings such as cheese, vegetables, and bacon.
This dish is ideal for those looking for a quick, healthy, and satisfying meal. Whether you are a busy professional, a parent preparing a family dinner, or a fitness enthusiastfocusing on nutritious meals, Hasselback Chicken is a great option.
What You Will Learn in This Guide
- A detailed ingredients list with dietary alternatives
- A step-by-step preparation guide for perfect results
- Serving suggestions and variations for different tastes
- Storage and reheating tips to keep the dish fresh
- Answers to common questions about making and modifying Hasselback Chicken
- Breakfast
This guide ensures that you can confidently prepare and customize this dish while achieving the best possible flavor and texture.
Table of Contents
Table of Contents
Ingredients List & Dietary Alternatives
Hasselback Chicken is a versatile dish that can be customized to suit different dietary preferences. Below is the classic ingredient list, along with recommended substitutions for those following keto, gluten-free, or vegetarian diets.
Main Ingredients
- 2 boneless, skinless chicken breasts – Choose high-quality, organic chicken for better flavor and texture.
- 1 tablespoon olive oil – Helps keep the chicken moist and enhances seasoning.
- ½ teaspoon salt – Enhances the natural flavors.
- ½ teaspoon black pepper – Adds mild heat and balance.
- 1 teaspoon garlic powder – Provides a deep, savory flavor.
- 1 teaspoon onion powder – Adds a subtle sweetness.
- 1 teaspoon dried parsley – Adds color and freshness.
- ½ teaspoon paprika – Gives a mild smoky taste and enhances color.
- ¼ cup shredded Monterey Jack cheese – Melts well and provides a creamy texture.
- ¼ cup zucchini, thinly sliced – Adds a fresh, slightly crunchy contrast.
- 2 slices Canadian bacon or turkey bacon – Infuses a smoky, salty depth.
Optional Add-Ons for Extra Flavor
- Sun-dried tomatoes – Introduces a tangy, slightly sweet bite.
- Fresh spinach – Adds fiber and extra vitamins.
- Mushrooms – Provides an umami-rich filling.
- Crushed red pepper flakes – Increases heat for those who prefer spice.
Dietary Alternatives & Modifications
Hasselback Chicken can be adjusted for different dietary needs. Here are a few simple swaps:
- Keto-Friendly:
- Replace zucchini with mushrooms or spinach, which are lower in carbs.
- Opt for mozzarella or cheddar cheese instead of Monterey Jack.
- Swap Canadian bacon for crispy bacon bits for a higher fat content.
- Gluten-Free:
- This recipe is naturally gluten-free, but it is important to check labels on seasoning blends and processed ingredients such as bacon.
- Low-Fat Option:
- Use reduced-fat cheese or skip the cheese entirely.
- Replace Canadian bacon with lean turkey slices.
- Use a smaller amount of olive oil for seasoning.
- Vegetarian Alternative:
- Substitute the chicken breasts with large portobello mushrooms or zucchini halves.
- Use plant-based cheese for a dairy-free alternative.
By choosing the right ingredients, you can tailor this recipe to fit your specific dietary preferences without sacrificing taste.
Step-by-Step Preparation Guide
Now that the ingredients are ready, it’s time to prepare and cook the Hasselback Chicken. Follow these detailed steps to ensure the chicken turns out flavorful, juicy, and perfectly baked.
Step 1: Preheat the Oven
- Set the oven to 400°F (200°C) to ensure even cooking.
- If using an air fryer, preheat it to 375°F (190°C).
Step 2: Prepare the Chicken
https://tasty.co/recipe/hasselback-chicken
- Place the chicken breasts on a cutting board.
- Use a sharp knife to make evenly spaced slits across the top of each chicken breast, about ½ inch apart.
- Be careful not to cut all the way through—the goal is to create small pockets for the filling.
Tip: To prevent cutting too deep, place a wooden spoon or chopsticks on either side of the chicken while slicing.
Step 3: Season the Chicken
- In a small bowl, mix olive oil, salt, black pepper, garlic powder, onion powder, paprika, and dried parsley.
- Rub or brush the seasoning mix all over the chicken, ensuring that it reaches inside the slits for maximum flavor.
- Let the seasoned chicken rest for 5-10 minutes to allow the flavors to absorb.
Step 4: Add the Fillings
- Stuff each slit with a slice of Canadian bacon, followed by zucchini slices, and finish with shredded Monterey Jack cheese.
- For extra variety, try adding spinach, mushrooms, or sun-dried tomatoes.
Tip: Press the fillings slightly into the slits so they stay in place during baking.

Carefully adding delicious fillings to the Hasselback Chicken.
Step 5: Bake the Chicken
- Lightly grease a baking dish with olive oil or non-stick spray.
- Place the stuffed chicken breasts into the dish, making sure they are not overcrowded.
- Bake for 22-25 minutes or until the internal temperature reaches 165°F (75°C).
For a crispy, golden-brown top:
- Switch to broil mode for the last 2-3 minutes.

Air Fryer Method:
- Cook at 375°F (190°C) for 15-18 minutes.
Step 6: Rest & Serve
- Once baked, remove the chicken from the oven and let it rest for 5 minutes before serving.
- Garnish with fresh parsley or a sprinkle of Parmesan cheese.
- Serve with roasted vegetables, a fresh salad, or whole grains for a complete meal.
The Hasselback Chicken is now ready to enjoy—crispy on the outside, tender on the inside, and filled with rich flavors.
Serving Suggestions & Creative Variations
Now that the Hasselback Chicken is fully prepared, let’s explore the best side dishes to complement its flavors and some creative recipe variations to keep the dish exciting.
Best Side Dishes for Hasselback Chicken
Pairing your Hasselback Chicken with the right sides enhances the meal’s overall balance. Here are some great options:
Light & Fresh Side Dishes
- Mixed Green Salad – A simple mix of lettuce, arugula, and cherry tomatoes with balsamic dressing.
- Steamed Broccoli – A nutritious option that pairs well with the flavors of the chicken.
- Cucumber and Avocado Salad – Adds a refreshing contrast to the rich, cheesy filling.
Hearty & Comforting Side Dishes
- Garlic Mashed Potatoes – Creamy potatoes with a buttery, garlicky flavor.
- Quinoa or Brown Rice – A high-fiber grain that complements the dish well.
- Roasted Sweet Potatoes – A slightly sweet and nutrient-dense side option.
Low-Carb & Keto-Friendly Side Dishes
- Cauliflower Rice – A perfect low-carb alternative to grains.
- Zucchini Noodles – Light and easy to prepare, great for keto diets.
- Grilled Asparagus – Adds a smoky depth to the meal.
Tip: Drizzle vegetables with olive oil and lemon juice before serving for extra flavor.
Creative Recipe Variations
If you want to switch up the flavors, try these exciting recipe variations:
Spicy Jalapeño & Cheddar Hasselback Chicken
- Replace Monterey Jack cheese with sharp cheddar.
- Add thinly sliced jalapeños for a spicy kick.
- Sprinkle with crushed red pepper flakes before baking.
Mediterranean-Style Hasselback Chicken
- Use feta cheese, spinach, and sun-dried tomatoes as fillings.
- Season with oregano, basil, and lemon zest.
- Serve with tzatziki sauce for a cool, creamy balance.
Pizza-Inspired Hasselback Chicken
- Stuff with mozzarella cheese and pepperoni slices.
- Add a spoonful of marinara sauce on top before baking.
- Sprinkle with Italian seasoning and Parmesan for extra flavor.
Garlic Butter & Herb Hasselback Chicken
- Melt butter with minced garlic and brush it over the chicken before baking.
- Stuff with mozzarella cheese and mushrooms for a creamy, earthy taste.
- Garnish with fresh thyme or rosemary.
Seasonal Twists for Different Occasions
Spring & Summer:
- Add fresh basil, cherry tomatoes, and ricotta cheese for a lighter, garden-fresh version.
Fall & Winter:
- Use butternut squash, goat cheese, and sage for a warm, comforting variation.
Storage & Reheating Tips
Hasselback Chicken is a great dish for meal prep, and proper storage ensures that leftovers remain fresh and flavorful. Follow these guidelines for storing and reheating without compromising texture or taste.
How to Store Hasselback Chicken
Refrigerator Storage (Best for 3-4 Days)
- Allow the chicken to cool completely before storing.
- Place it in an airtight container or wrap it tightly with foil or plastic wrap.
- Store in the refrigerator for up to 4 days.
Freezer Storage (Best for 2-3 Months)
- Wrap each chicken breast individually in plastic wrap and place it in a freezer-safe bag.
- Label with the date to keep track of freshness.
- For best results, thaw in the refrigerator overnight before reheating.
Tip: If meal prepping, freeze the chicken before baking and cook fresh when needed.

Best Methods for Reheating Hasselback Chicken
Oven (Best for Retaining Juiciness & Texture)
- Preheat oven to 350°F (175°C).
- Place the chicken in a baking dish and cover loosely with foil to prevent drying out.
- Bake for 15-20 minutes, or until heated through.
Tip: Brush with olive oil or broth before reheating for extra moisture.
Air Fryer (For a Crispy Finish)
- Set the air fryer to 375°F (190°C).
- Heat for 5-7 minutes, checking to ensure it is warmed through.
Tip: Cover loosely with foil for the first few minutes to prevent excessive drying.
Microwave (Quickest but Can Dry Out the Chicken)
- Place the chicken on a microwave-safe plate.
- Cover with a damp paper towel to help retain moisture.
- Heat in 30-second intervals, checking frequently to avoid overcooking.
Tip: The microwave is best used for small portions rather than reheating the whole dish.
Can You Eat Hasselback Chicken Cold?
Yes, it can be sliced and added to salads, wraps, or sandwiches for a refreshing cold meal.
Frequently Asked Questions (FAQs)
1. How do I prevent the chicken from drying out?
Do not overbake—remove the chicken once the internal temperature reaches 165°F (75°C).
Brush the chicken with olive oil or melted butter before baking to keep it moist.
Cover the dish with foil for the first half of the baking time to lock in moisture.
2. Can I make Hasselback Chicken ahead of time?
Yes, you can prepare it in advance.
Slice and stuff the chicken up to 24 hours before cooking and store it in the refrigerator.
When ready to cook, remove it from the fridge and let it sit at room temperature for 10-15 minutes before baking.
Tip: If meal prepping, you can freeze the stuffed raw chicken and bake it fresh when needed.
3. What’s the best cheese for Hasselback Chicken?
Monterey Jack – Melts smoothly and has a mild flavor.
Mozzarella – Classic, creamy, and stretchy.
Cheddar – Sharp and tangy for a bolder taste.
Feta or Goat Cheese – Ideal for a Mediterranean-inspired version.
Tip: Avoid using hard cheeses like Parmesan, which do not melt well.
4. Can I use chicken thighs instead of breasts?
Yes, boneless, skinless chicken thighs work well and offer a juicier texture. However, because thighs are smaller, you may need to adjust the number of slits and slightly reduce the cooking time.
5. What can I use instead of bacon?
Turkey bacon – A leaner alternative.
Sliced ham – Adds a mild, salty flavor.
Mushrooms or spinach – Great for a vegetarian version.
6. Can I make this dish in an air fryer?
Yes, Hasselback Chicken cooks well in an air fryer.
Preheat to 375°F (190°C).
Cook for 15-18 minutes, checking for doneness at 165°F (75°C).
For a crispy top, increase the temperature slightly in the last 2-3 minutes.
Tip: Place a piece of foil underneath the chicken to catch melting cheese and prevent mess.
Here are answers to some of the most common questions about making and customizing Hasselback Chicken.
Conclusion & Final Thoughts
Hasselback Chicken is a versatile, flavorful, and easy-to-make dish that suits a variety of dietary preferences. Whether you are looking for a quick family dinner, a meal prep option, or a healthy high-protein dish, this recipe provides a delicious solution that can be easily customized to fit your needs.
Key Takeaways
- The Hasselback slicing technique allows for deep seasoning and filling, ensuring every bite is packed with flavor.
- Customizable ingredients make it suitable for keto, gluten-free, and vegetarian diets.
- Serving suggestions include fresh salads, roasted vegetables, and hearty grains to create a well-balanced meal.
- Storage and reheating tips ensure that leftovers remain moist and flavorful.
- Different fillings and seasoning variations allow you to experiment with flavors such as Mediterranean, spicy jalapeño, or garlic butter herb.
By following this guide, you can create a delicious and visually impressive Hasselback Chicken that is sure to become a favorite in your meal rotation.
PrintIrresistible Hasselback Chicken: Quick, Healthy, and Delicious
Hasselback Chicken is a delicious and easy-to-make dish that combines tender chicken with flavorful fillings like cheese, vegetables, and bacon. This quick and healthy recipe is perfect for busy weeknights, meal prep, or a wholesome family dinner. It can also be customized to fit various dietary preferences, including keto, gluten-free, and vegetarian options.
- Prep Time: 10 minutes
- Cook Time: 25 minutes
- Total Time: 35 minutes
- Yield: 2 servings 1x
- Category: Main Course
- Method: Baking
- Cuisine: American
Ingredients
Main Ingredients
- 2 boneless, skinless chicken breasts
- 1 tablespoon olive oil
- ½ teaspoon salt
- ½ teaspoon black pepper
- 1 teaspoon garlic powder
- 1 teaspoon onion powder
- 1 teaspoon dried parsley
- ½ teaspoon paprika
- ¼ cup shredded Monterey Jack cheese
- ¼ cup zucchini, thinly sliced
- 2 slices Canadian bacon or turkey bacon
Optional Additions & Substitutions
- Sun-dried tomatoes for a tangy twist
- Spinach or mushrooms for added nutrients
- Mozzarella, feta, or cheddar for different flavors
- Crushed red pepper flakes for a spicy version
Instructions
Step 1: Preheat the Oven
- Preheat the oven to 400°F (200°C).
- If using an air fryer, preheat to 375°F (190°C).
Step 2: Prepare the Chicken
- Place the chicken breasts on a cutting board.
- Use a sharp knife to make ½-inch deep slits across the top, being careful not to cut all the way through.
Step 3: Season the Chicken
- In a small bowl, mix olive oil, salt, black pepper, garlic powder, onion powder, paprika, and dried parsley.
- Rub or brush the seasoning mix all over the chicken, including inside the slits.
- Let the chicken sit for 5-10 minutes to absorb the flavors.
Step 4: Add the Fillings
- Stuff each slit with a slice of Canadian bacon, followed by zucchini slices, and finish with shredded cheese.
- Gently press the fillings into place so they do not fall out.
Step 5: Bake the Chicken
- Place the stuffed chicken breasts in a greased baking dish.
- Bake for 22-25 minutes or until the internal temperature reaches 165°F (75°C).
- For a crispy top, switch to broil mode for the last 2-3 minutes.
Step 6: Let It Rest & Serve
- Remove from the oven and let the chicken rest for 5 minutes before serving.
- Garnish with fresh parsley or Parmesan cheese and serve with your favorite side dish.
Notes
- For extra juiciness, brush the chicken with melted butter before baking.
- Meal prep tip: Slice and stuff the chicken ahead of time, then bake fresh when ready.
- Air Fryer Method: Cook at 375°F (190°C) for 15-18 minutes, checking for doneness.
Nutrition
- Calories: 320
- Sodium: 580mg
- Fat: 15g
- Carbohydrates: 5g
- Fiber: 1g
- Protein: 38g
Keywords: Hasselback Chicken, Stuffed Chicken, Easy Chicken Recipe, Low-Carb Chicken, Healthy Dinner, Meal Prep Chicken